First follow the Getting started with TextTest guide to install the TextTest development tools for your platform.
The final code for this tutorial is available in the hello world example repository.
Let’s create a “hello world” command-line script that we can write tests for. How you will do this will depend on which platform and programming language you are using. In this tutorial we’ll assume you are using Python in a linux or mac terminal, or git bash on Windows.
Save this text to a file named hello.py:
#!/usr/bin/env python
print("Hello, World!")
When you’ve done that you should be able to execute the program and see the message:
$ python hello.py
Hello, World!
Now we are ready to write a test for this program using TextTest.
Create a folder to store your test cases in, below hello.py, called tests and put a file in it called config.hello, containing this text:
executable:${TEXTTEST_HOME}/hello.py
interpreter:python
filename_convention_scheme:standard
full_name:Hello World
The config file is absolutely central to how TextTest works, and it’s important to get the format right. These key - value pairs specify for TextTest what’s going to be tested, and there are many more options for this file which you will learn about later on. Note - it’s important to use a colon : as separator for key:value, and that there should be no spaces on either side.
The entry executable should contain the full path to the program we want to test. Here we are using the environment variable TEXTTEST_HOME but it could be an absolute path on your machine.
The entry interpreter is actually optional, if your program is directly executable you don’t need it. In this case we have a python script and we want to use python as the interpreter.
The entry filename_convention_scheme defaults to classic, but the newer scheme standard is more consistent and easier to use. It has more sensible filenames when testing a command line program like this one.
The entry full_name refers to the display name of the system under test. The filename suffix (in this case .hello) is what’s actually used by TextTest to identify the system under test. This has to be short and not contain spaces. Here I’ve chosen ‘hello’ for the short name because that is the filename of this program. Additionally specifying a full name like this will make the test reports easier to read and understand.
Now we have a config file, we can start the TextTest development tool.
This is the development tool used to create and manage test cases.
Using a command prompt in the same folder as hello.py, start texttest:
$ texttest
First set the environment variable TEXTTEST_HOME to the folder containing hello.py, then start TextTest from the windows menu. Alternatively, open Powershell in the same folder as the hello.py script and type texttest
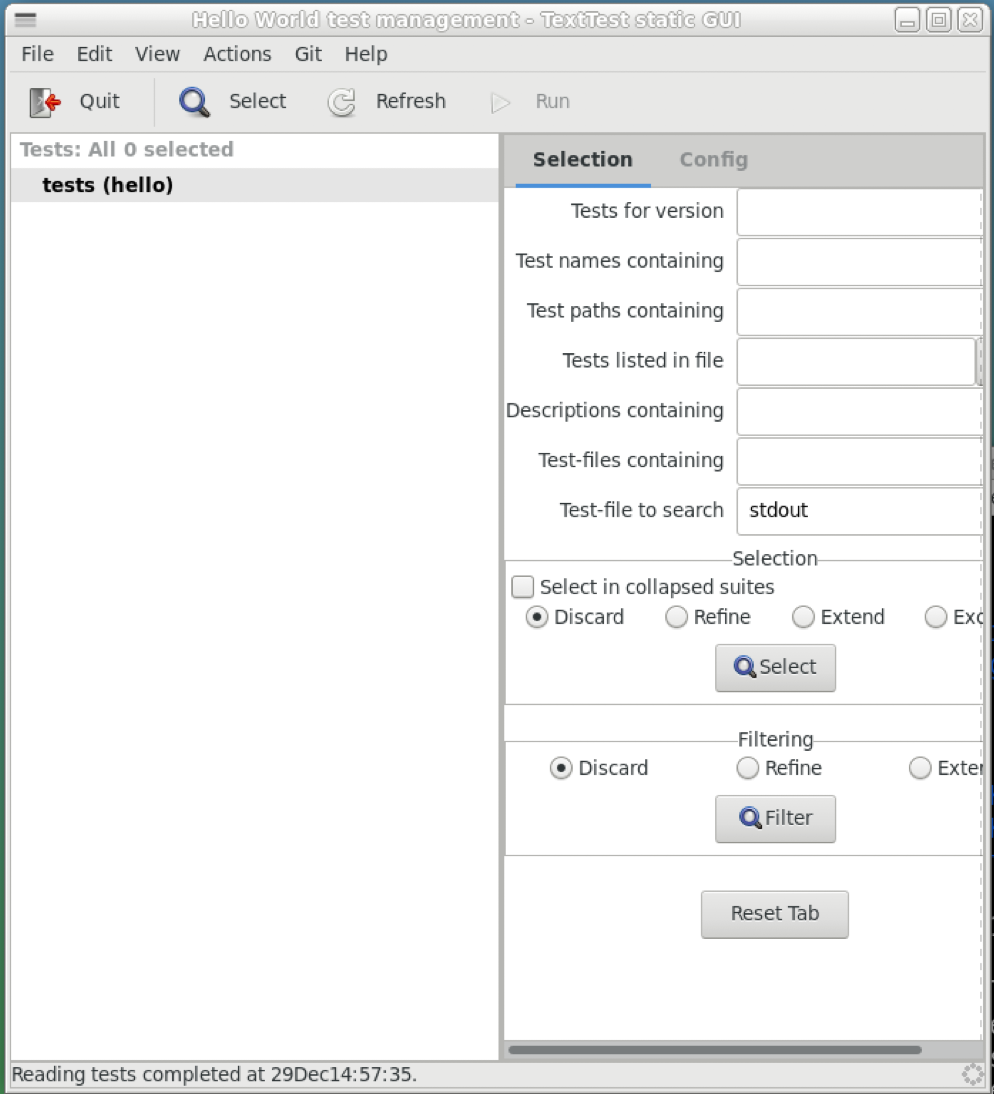
Texttest should open a new window that looks like this:
The left hand side of the screen shows the test suite - there are no test cases, so it is empty apart from the root. On the right hand side there are two tabs - “Selection” and “Config”. The “Selection” tab will let you select which tests to run - not very useful yet since we don’t have any. It’s meant for the case when you have hundreds of test cases and only want to run a few of them.
If you change to the “Config” tab you can see the config file we created earlier, and a “personal config file”.
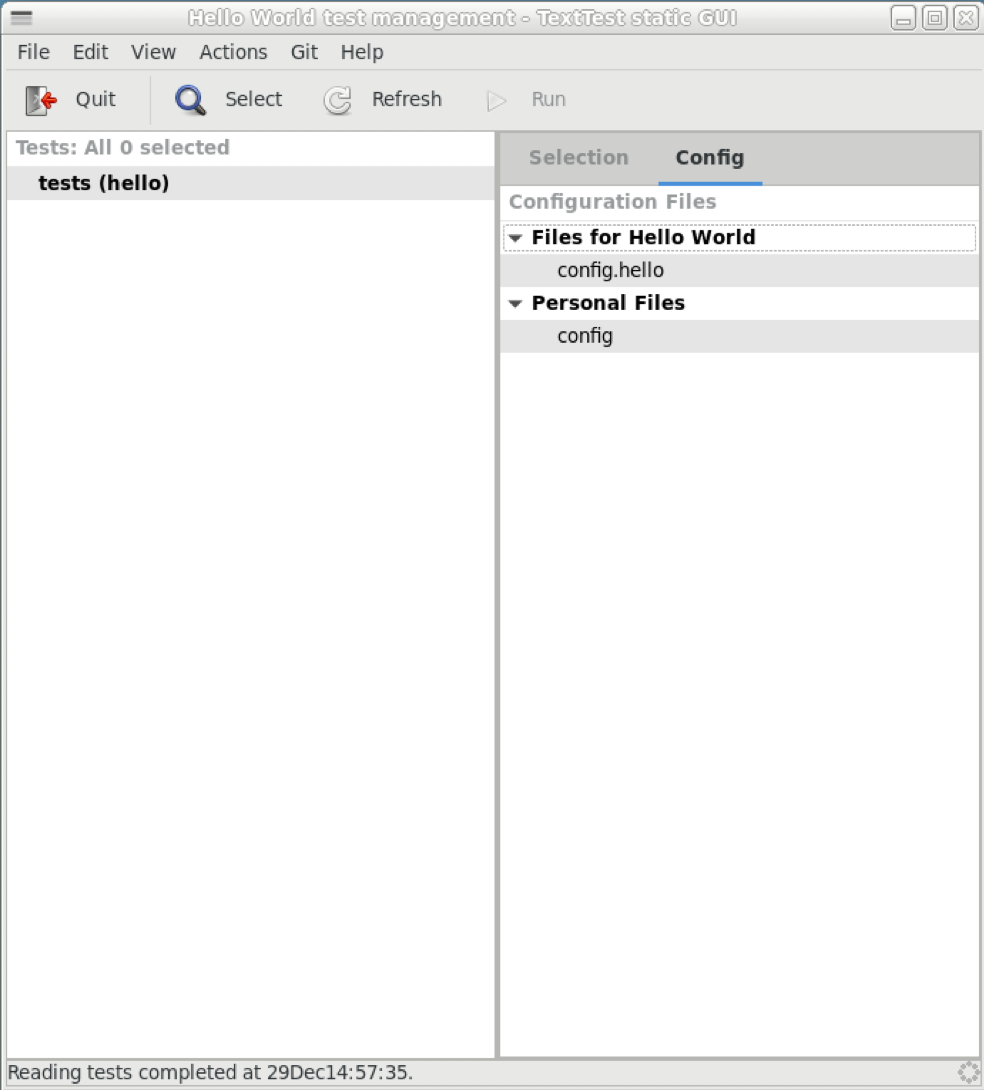
If you double-click on the config.hello file, it will open it in an editor. Which editor it chooses depends on your platform, but it might not be an editor you prefer. In that case, you will want to change the settings in your personal config file. Follow this guide: how to configure your editor.
First select the root of the test suite by clicking on the left hand side where it says “tests (hello)”.
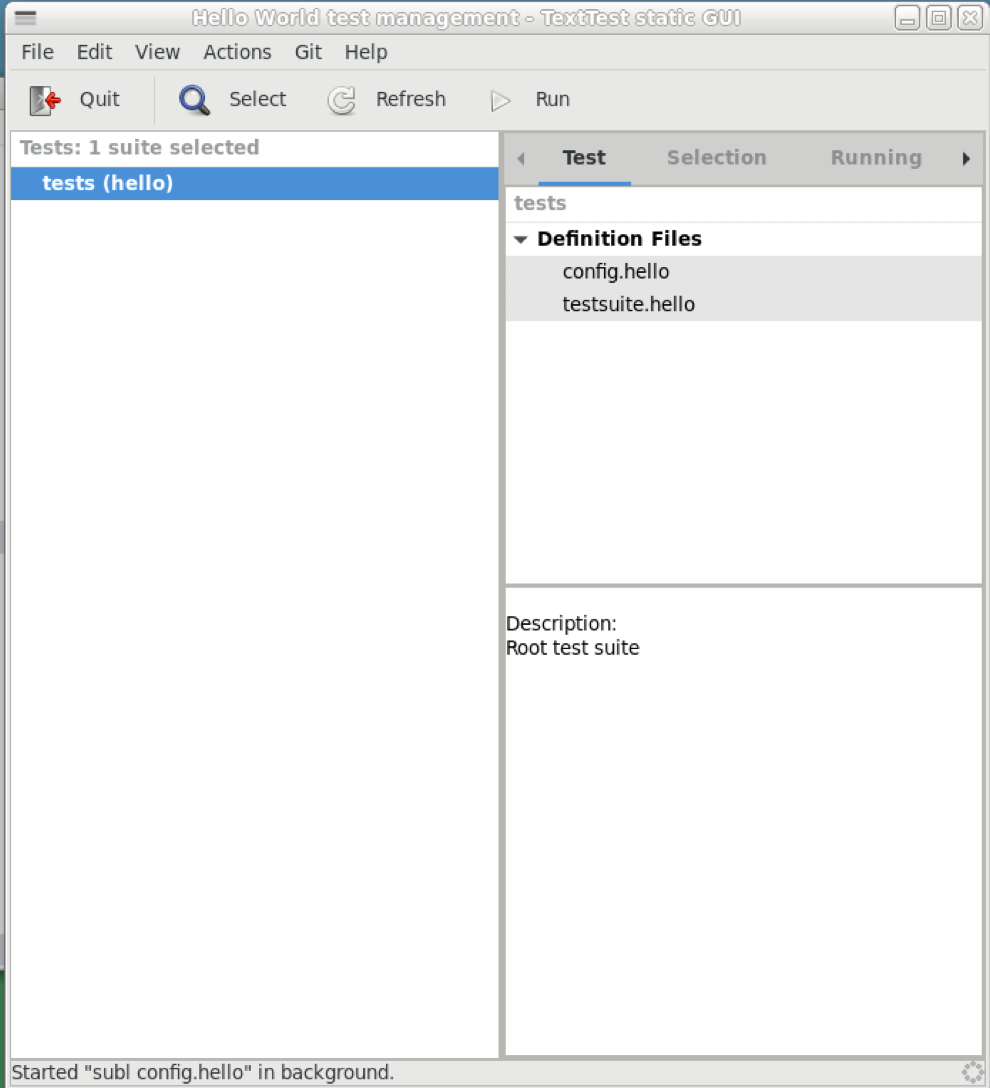
When the root of the test suite is selected, additional tabs appear on the right hand side: “Test” and “Running”. We also get new menu options, if you look on the “Edit” menu you should find “Add Test”. Selecting that opens a dialog:
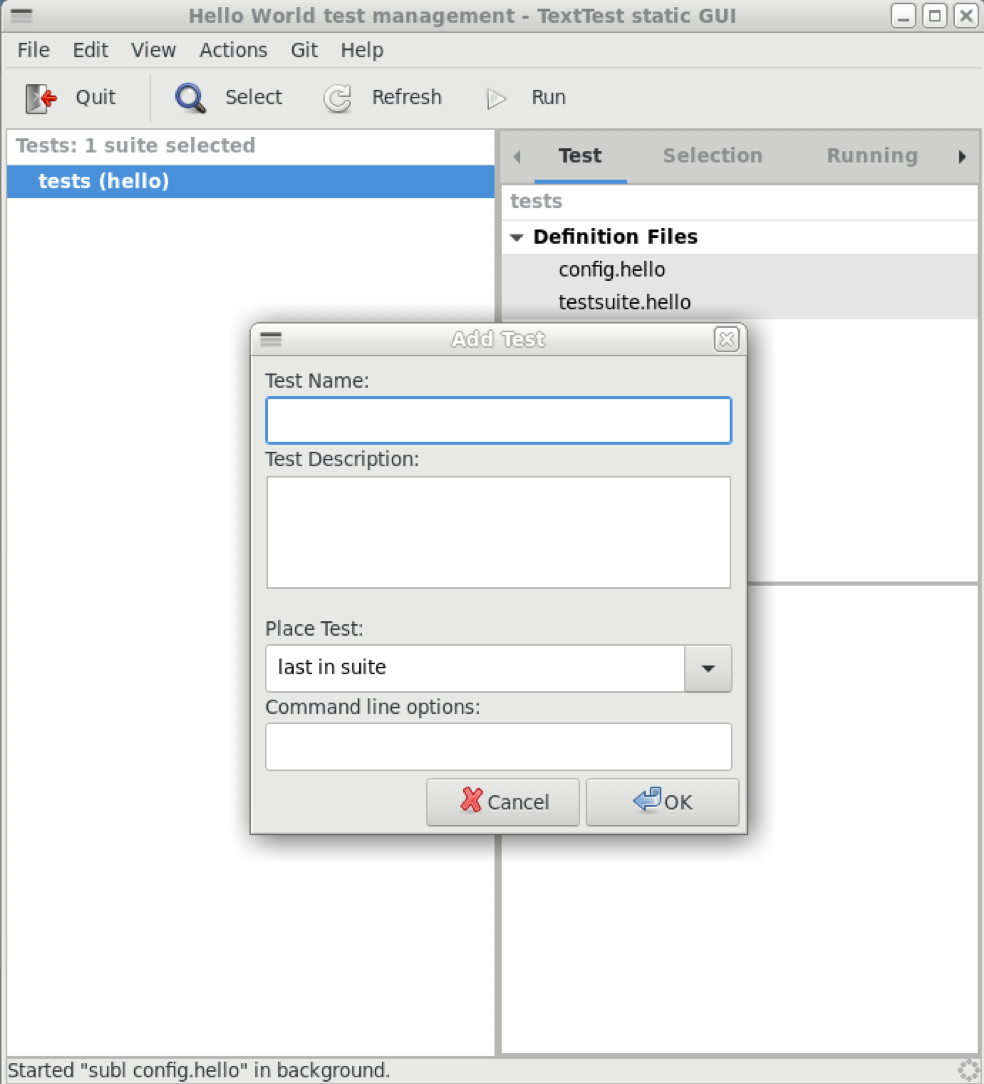
Fill in a test name smoke, I often use that name for the first test I create in a suite. It’s going to be the simplest imaginable test case - just turn it on and see if smoke comes out. You don’t need to set any of the other options but you could write a longer description if you want. The test name itself should not be too long, and should not contain spaces.
Now you can see the new test case in the tree on the left side of the screen. On the right hand side on the “Test” tab you can see two sections - “Approved Files” and “Definition Files”. Both sections are currently empty.
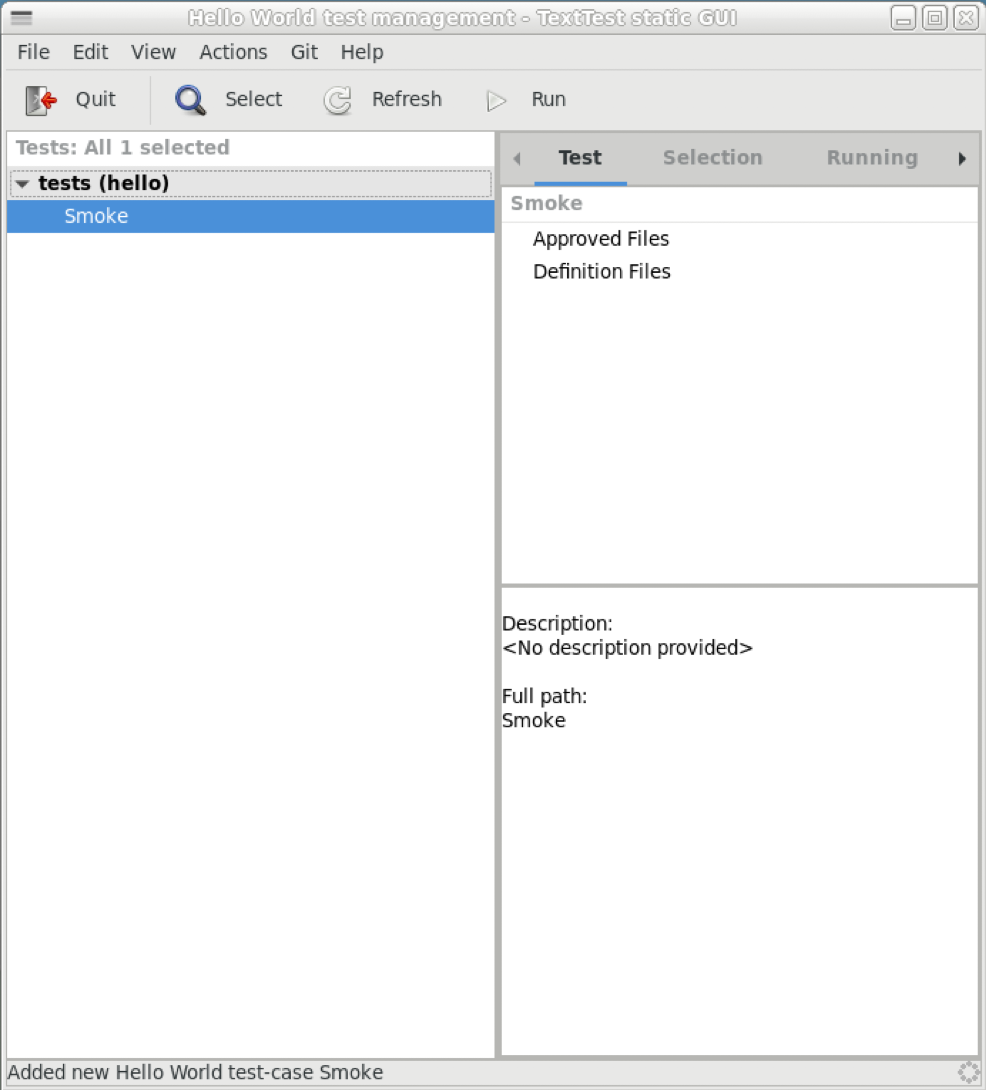
Most test cases will need at least one definition file that specifies more details about how to run the system under test. For this simple smoke test, we will just run the hello.py executable with no command-line options or data files or similr, so we don’t need any definition files.
In order for the test to be complete though, it will need at least one approved file to compare the actual output against. The way to create that, is to run the test and see whether we want to approve the output we actually get. You can run the test by selecting “Run” on the “Actions” menu.
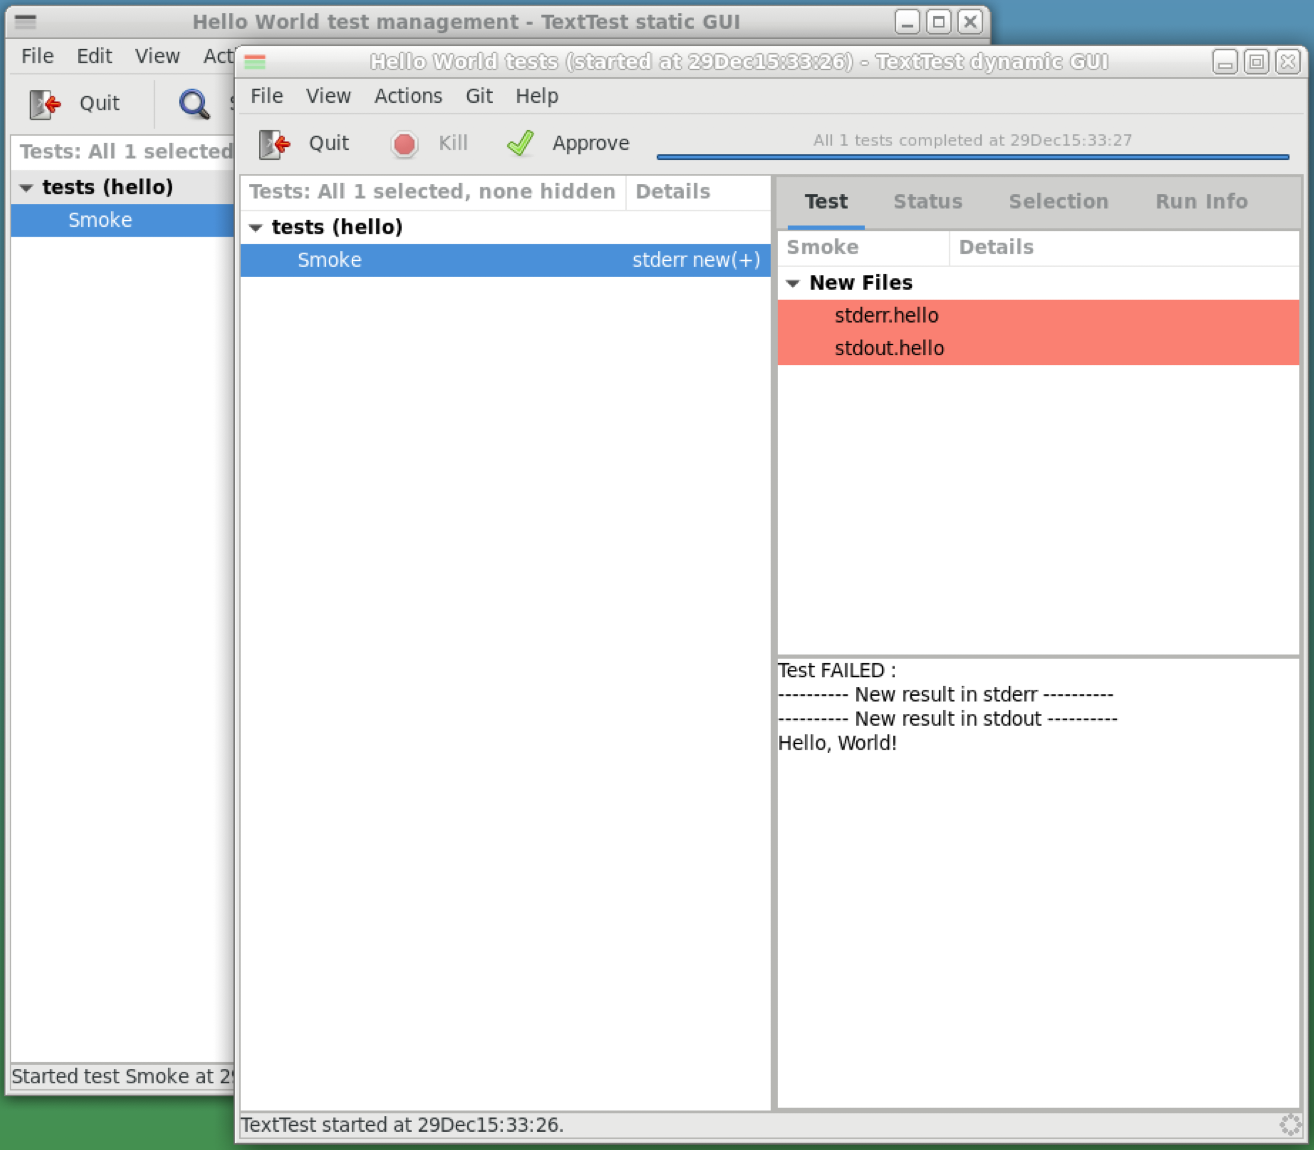
This will open a new window, called the “Dynamic GUI”. Every time you run any tests, you get a new window. Be aware it might open on top of the “Static GUI” which you have been using up until now. It’s quite important to distinguish these two windows, which superficially look quite similar. The static GUI is for managing test cases and initiating test runs. The dynamic GUI just shows the results of one test run, and lets you examine failures and decide whether to approve or reject changes.
In the dynamic GUI for this test run, we can see the test suite on the left with the Smoke test selected. On the right we can see it has failed and there are “New Files”. These two files were gathered from the standard output and standard error from running hello.py. On the lower right you can see a preview of the contents of each file. Double click on their filenames if you want to view them in your editor.
The output “Hello, World!” in standard output, and an empty result in standard error looks like exactly what we wanted. This is a result we can approve. You can click the “Approve” button or select “Approve” from the right menu. When you’ve done that, the test is marked as passed in the dynamic GUI.
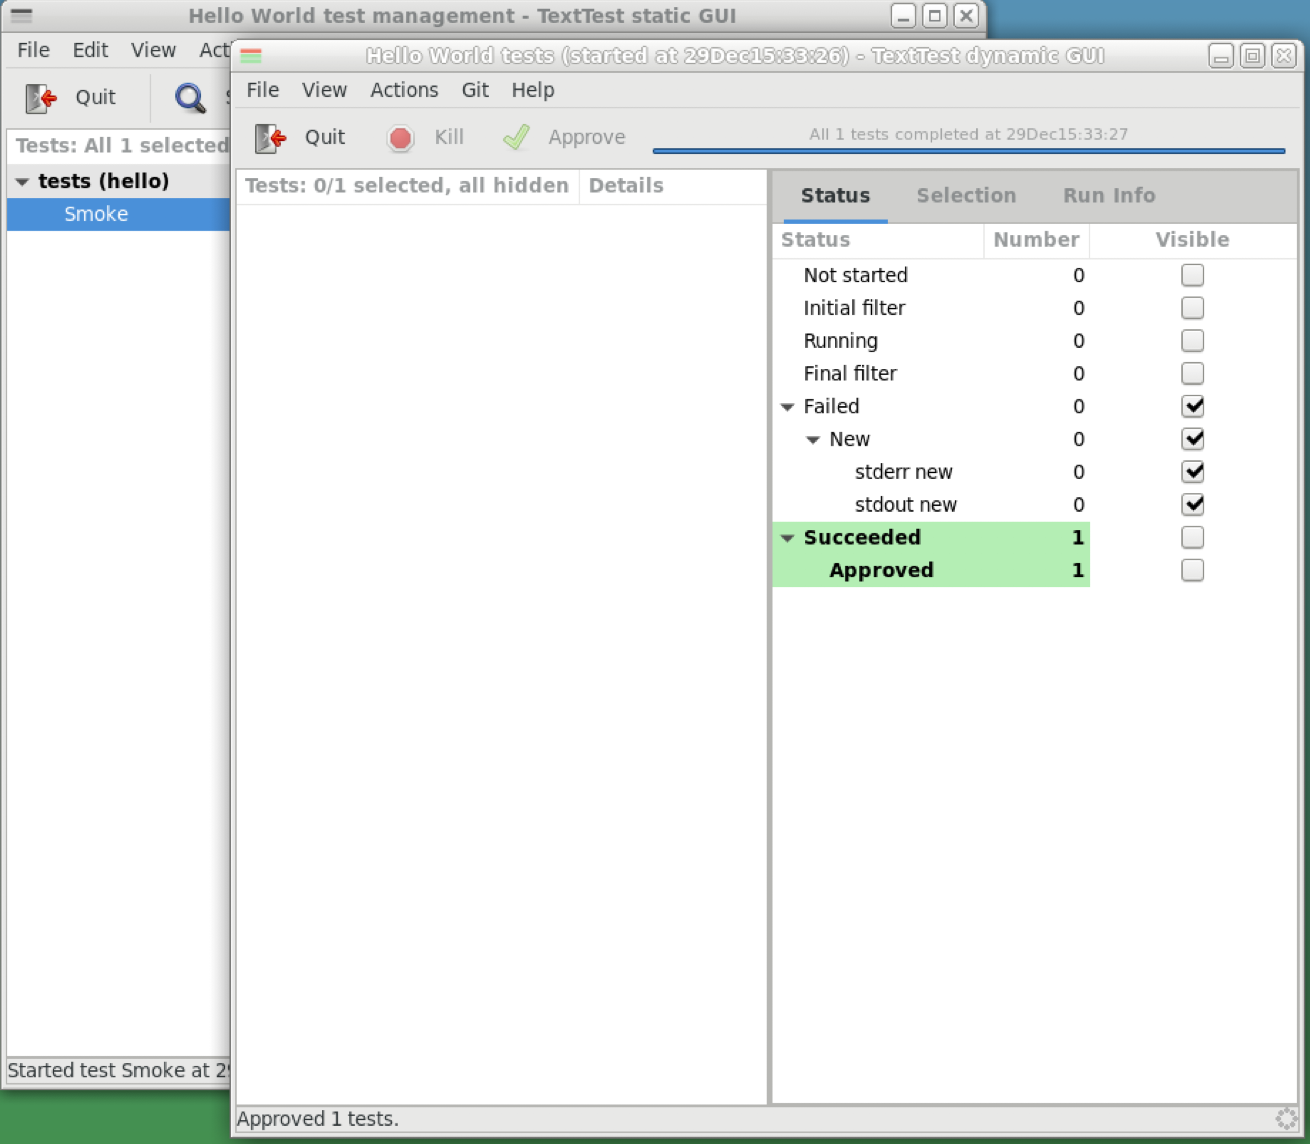
By default the dynamic GUI only displays failing tests. On the right hand side you can see checkboxes, one of which lets you also see Succeeded tests. If you check there you will be able to see the Smoke test in the test suite on the left.
Close the dynamic GUI - we don’t need it any more now we have examined and acted on the results of this test run. The static GUI behind is now updated with the new approved files.
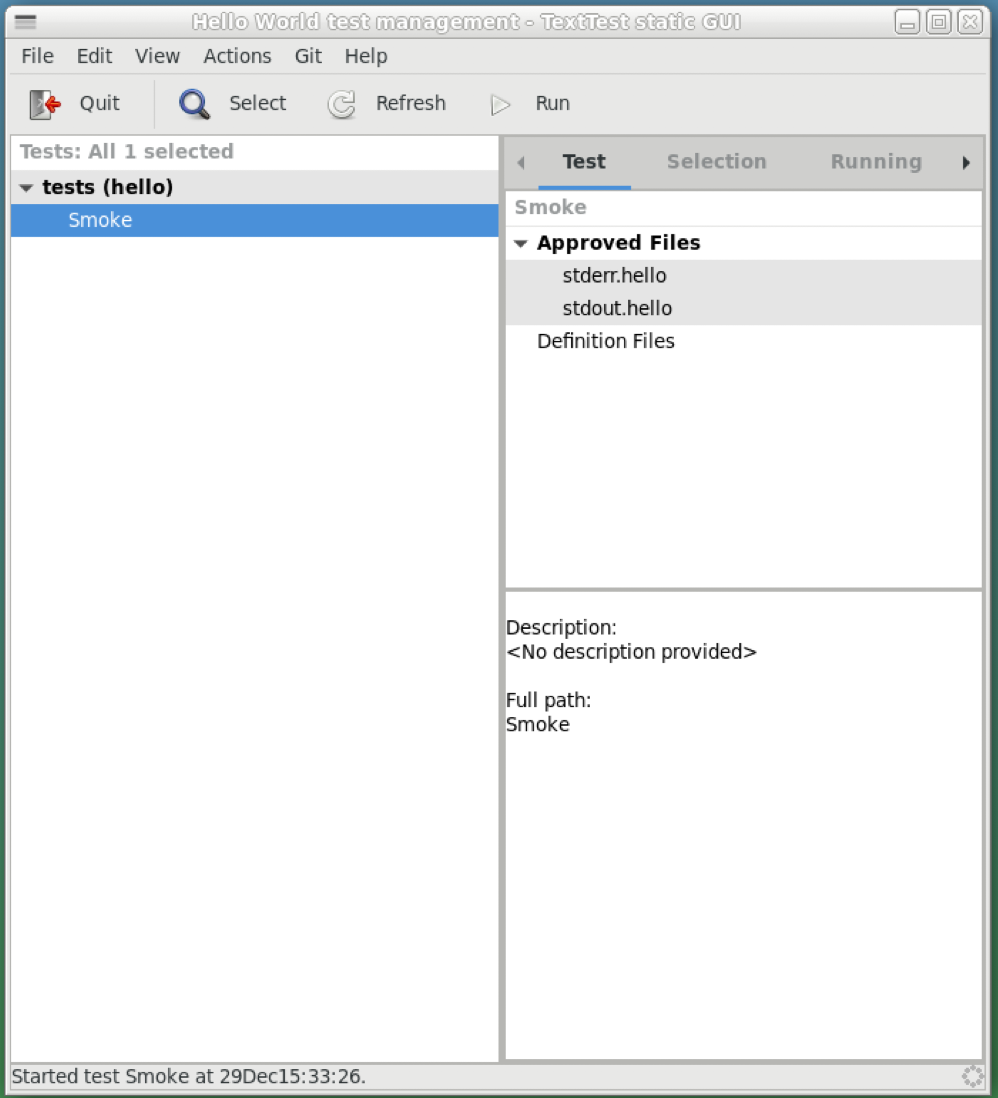
This smoke test is now complete and you can run it again and see it pass. TextTest will execute the hello.py program, gather its output from standard error and standard output, compare them against the previously approved files - then if they match exactly, mark the test as passed.
Take a minute to look at all the files that TextTest has created. It should be the same as this hello world example. In principle you could do everything you’ve just done using the TextTest GUIs by hand, it’s all just folders and files containing plain text. The GUIs are a useful convenience though. Everything being plain text also makes the test suite quite straightforward to store in a version control system like git.
Now you have learnt how to test a Hello World command-line program you might want to try some of the other exercises in the TextTest course.